I had attended Oracle's VM Roadshow in Riyadh recently and wanted to test Oracle VM Server 2.2.1 to see if it was worth the hype.
I planned to Install Oracle VM Server and Oracle VM Manager as a VMware guest, but when I researched on various forums and blogs including OTN, I came to know that "Oracle VM Server is a bare-metal product and that it cannot be installed as a VMware guest!".
Failure to procure a spare machine and having some time to kill made me try and succeed in installing Oracle VM Server and Oracle VM Manager as a VMware Guest.
The following are the steps:-
Download Oracle Server and Oracle VM Manager from http://edelivery.oracle.com/oraclevm
Open VMware and select New Virtual Machine option.
Select the option Typical for type of configuration.

Click next to go to the next screen
Select “Installer disk image file” option here and browse and select the iso file of Oracle VM Server you downloaded from the above link.

Select Linux as OS

Select the Location where you want to store the Virtual Disk

Specify the maximum size of the disk

Click Finish

Oracle VM Server loads
Press Enter to start the installation of Oracle VM Server

Press Skip


Press Yes to Create new partitions


Click Yes to confirm


Click Yes to Review and Modify Partition Layout

Click on the /OVS mount point and select Delete
Goto the / partition select EDIT

Select the option Fill all the available space and press OK(If you go with the defaults then during the installation of Database XE the pre-requisites might fail, as it requires a minimum space of 2600 MB in the installation drive.)

Press OK on the partitioning page

Press OK on Boot Loader Configuration Screen

Select OK on Oracle VM Management Interface

Select Manual address configuration on the IPv4 Configuration Screen and specify the IP and Netmask

Set the Gateway and Primary DNS

Manually Set the Hostname

Set the Time Zone

Set the Oracle VM Agent Password


click OK to begin the installation


Select Reboot after the installation is completed

When the VM is restarting press enter to enter the GNU-GRUB to select the 32-bit option else you will encounter an error "ERR: Not a 64-Bit CPU!erver-ovs (xen-64-3 .1.3 2.6.18-8.1.15.0.16.el5ovs)'" as by default the Oracle VM Server boots as a xen-64-3 .1.3 2.6.18-8.1.15.0.16.el5ovs!

When you press Enter during reboot you will see the below screen, select the first option and press enter

You will be prompted for EUL Agreement, select Agree

Login with Username 'root' and its password.

Installing and Configuring Oracle VM Manager 2.2
Goto Virtual Machine Settings and change the change the CD/DVD ISO image to point to the iso image of VM Manager you downloaded from Oracle Website.
Execute the following as root
# mkdir /media/cdrom
# mount /dev/cdrom /media/cdrom
#cd /media/cdrom
#sh runInstaller.sh
This will start the Oracle VM Manager Installation
This will start the Oracle VM Manager Installation


Select the option 1 on the next screen

Select 1 on the next screen

Specify the passwords for SYS and SYSTEM

Select 'y' on the next screen

Set the 'OVS','oc4jadmin','keystore','admin' Passwords


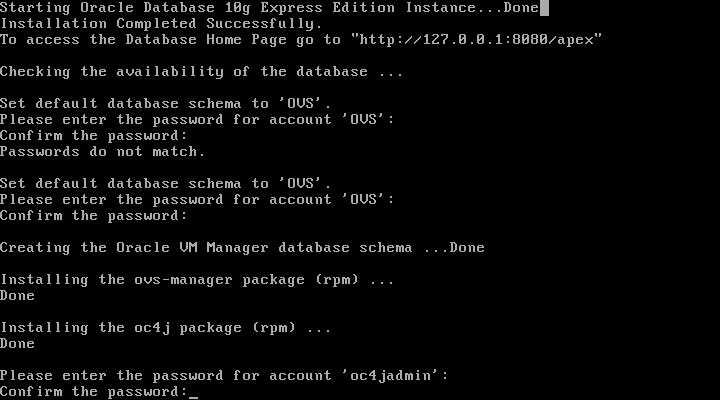

Enter the outgoing SMTP mail server to end the installation.

As Oracle VM server does not include XWindows thus there is no Graphical User Interface.
So, from the browser of Host PC of VMware Workstation enter the following address
So, from the browser of Host PC of VMware Workstation enter the following address
https://192.168.1.111:4443/OVS or
https://ahmed.blogspot.com/OVS(If you mapped VM Server IP to Host name in etc/hosts file
And, you would see Oracle VM Manager home screen
All the Best ;)
No comments:
Post a Comment