I had a recent activity which involved configuring Oracle BI Applications to utilize the preconfigured reports that come with it.
I was able to do the entire setup on my Dell Vostro with 4GB RAM and 2.2 GHz processer, but for better performance I would recommend better hardware.
When I initially started I had difficulty as the Oracle Documentation is very vast and it’s not specific to Oracle EBS, and deals with PeopleSoft, JD Edwards, Siebel and Oracle EBS moreover you will have to follow different guides for OBI Apps, Informatica and OBIEE.
Thus I have compiled this precise document which should help anyone who is planning this setup.
The following Steps also include the common issues you might encounter during setup and their solution.
Before proceeding you will require the following software’s.
4) Oracle EBS R12(Which will be the source)
5) Informatica 8.6 with hot fix 6 (You will get this along with the CD’s for Oracle BI Apps), if you don’t then try torrents.
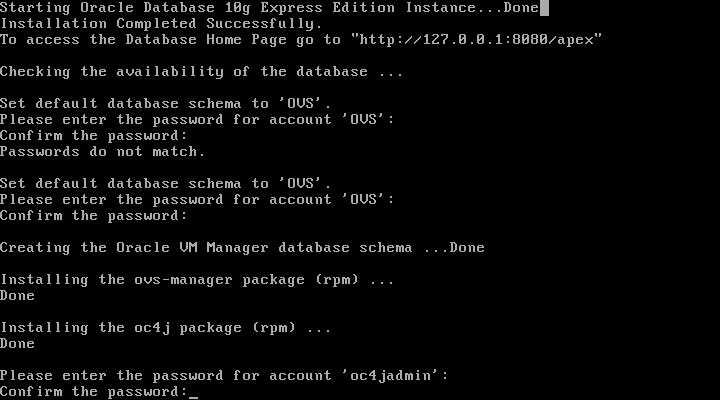
6) Oracle Database 10g(Which will hold DAC and Informatica Repositories) http://www.oracle.com/technetwork/database/enterprise-edition/downloads/index.html
Assumptions:-
I am assuming that you have already installed Oracle BI Enterprise Edition 10(which should be a complete installation).
I am assuming that you have already installed an Oracle 10g/11g database to store the DAC Repository, Informatica Repository and the Oracle Business Analytics Warehouse.
I am assuming that you have already installed Oracle EBS R12
Step 1)
Database Configurations –
Create two users dac_rep and info_rep which will be the schemas for the DAC Repository and Informatica Repository.
Creating schema’s :-
Create user dac_rep identified by dac_rep;
Create user info_rep identified by info_rep;
**For Performance you can give separate tablespaces for both the users.
Creating SSE_ROLE
Create role sse_role;
Grant connect,resource to sse_role;
Grant sse_role to dac_rep
Step 2)
Installing Oracle BI Apps
1) Click on Setup.exe -> on welcome page click next ->Give the locations of Oracle BI Infrastructure and Oracle BI Data(Ex: - ‘D:/OracleBI’ and ‘D:/OracleBIData’) -> select the application you want to install, select Financial Analytics Now wait after clicking on next till the finish button is displayed->click on finish
Step 3)
Installing Informatica Power Center
a) Installing informatica Power Center Client Tools
Run the install.exe from PowerCenter_8.6.1_SE_for_Windows_32bit, follow the instructions of the installation wizard
b) Installing Informatica PowerCenter HotFix 6
Install Informatica PowerCenter Hotfix 6 from the PowerCenter_8.6.1_HotFix6_for_Windows_32bit follow the instructions of the installation wizard.
c) Installing Informatica Power Center Services 8.6.1
Run the install.bat from PowerCenter_8.6.1_SE_for_Windows_32 , follow the instructions of the installation wizard.
d) Install the Informatica PowerCenter Hotfix 6
Install the Informatica PowerCenter Hotfix 6 from the PowerCenter_8.6.1_HotFix6_for_WIN_32 and follow the instructions of the installation wizard.
Step 4)
Creating the Informatica Repository Service
Go to Start->Programs->Informatica->Informatica PowerCenter Administration Console
On the left side of the Administration Console click create and then select ‘Create Repository Service’
The following are the options:-
Service Name – Name of the Repository Service
This name should be same as your OBIEE Repository name that got installed with , ex:- Oracle_BI_DW_Base, which got installed during the installation of Oracle BI Applications(in location OracleBI\dwrep\Informatica\Repository)
If you name it to something else other than the repository than you will have problems later as oracle ‘assumes’ that you shall name it the same as Oracle BI Repository,
Unfortunately I did the mistake of naming it different and it took me a week to realize what the problem was!
Location – Domain and Folder where the service is created
License - Leave it as it is
Version – Leave it as it is
Node- Leave it as it is
Primary Node – Leave it as it is
Backup Nodes - Leave it as it is
Database Type – Leave it as it is
CodePage – Leave it as it is
ConnectString – Use the service name of the database 10g Database, that will hold the informatica repository i.e orcl
DBUser – info_rep
DBPassword – Password of info_rep
Tablespace_name – Leave it as it is
Creation Mode – Select ‘Create new repository content’
Enable the repository Service – Select this option to enable the service after its creation
Step 5)
Creating the Informatica Integration Service
Go to Start->Programs->Informatica->Informatica PowerCenter Administration Console
Service Name – Name of the Integration service
Location – Leave it as it is
License – Leave it as it is
Version – Leave it as it is
Assign – Leave it as it is
Run the Service on Grid – Leave it as it is
Primary Node – Leave it as it is
Backup Nodes – Leave it as it is
Domain of Associated Repository Service – Leave it as it is
Associated Repository Service – Select the Repository
Repository User Name – info_rep
Repository Password – info_rep
Security Domain – Leave it as it is
Data Movement Mode - Leave it as it is
Step 6)
Restoring the Prebuilt Informatica Repository
1) Copy the file Oracle_BI_DW_Base.rep from OracleBI\dwrep\Informatica\Repository to \Informatica PowerCenter8.6.1\server\infa_shared\Backup directory.
2) In Informatica PowerCenter Administration Console, select Oracle_BI_DW_Base
3) In the General Properties area of the Properties tab, make sure the OperatingMode value is Exclusive.
To change the Operating Mode value, click Edit, and then select a new value from the drop-down list. Click OK to exit edit mode.
4) Choose Actions, then Delete Contents.
5) At the Delete Contents for <repository name> dialog box, enter Oracle_BI_DW_Base and password (for example, Administrator\Administrator), then click OK.
6) Choose Actions > Restore Contents.
7) At the Restore Contents dialog box, select Oracle_BI_DW_Base.rep from the Select Backup File drop-down list.
8) Select the Restore as New check box.
9) Click OK to start the restore process.
10) When the restore process is complete click close
11) When a repository is restored, the repository becomes a standalone repository. After restoring the repository, you need to promote it to a global repository.
12) In the Administration Console, select Oracle_BI_DW_Base.rep .
13) If the Repository Service is running in normal mode, change the operating mode to exclusive.
14) If the Repository Service is not enabled, click Enable.
15) In the general properties for the service, click Edit.
16) Select GlobalRepository, and click OK
17) Enter your user name, password, and security domain,Click OK.
18) Change the OperatingMode value to Normal.
a. Go to the Properties tab.
b. In the General Properties area, click Edit.
c. Click the OperatingMode drop-down list, and select Normal.
19) If prompted, enter the repository username and password.
Step 7)
Copying Source Files and Lookup Files
1) Copy the source files in \OracleBI\dwrep\Informatica\SrcFiles on the machine where the Oracle BI Applications installer was run to the source files directory on the PowerCenter Services machine, for example \Informatica PowerCenter8.6.1\server\infa_shared\SrcFiles
2) Copy the lookup files in \OracleBI\dwrep\Informatica\LkpFiles on the machine where the Oracle BI Applications installer was run to the lookup files directory on the PowerCenter Services machine, for example Informatica PowerCenter8.6.1\server\infa_shared\LkpFiles.
Step 8)
Setting PowerCenter Integration Services Custom Properties
To set Informatica PowerCenter Integration Services Custom Properties, In Informatica PowerCenter Administration Console, select the Integration Service -> Click the Properties tab -> In the Custom Properties area, click Edit -> Create a custom property by clicking Add to display new Name and Value fields
Click Add and add the following
ServerPort 4006(Default)
overrideMpltVarWithMapVar Yes
Click ok
Step 9)
Creating the Repository Administration User in Native Security Domain
1) Go to PowerCenter Administration Console -> click Configure Security icon in the top, right corner of the page-> on security page, click Create User, or select an existing user defined in the native domain
2) On the Privileges tab of the new or existing user, click the appropriate Repository Service.
3) In the Edit Roles and Privileges page, expand the Repository Service, and under System-Defined Roles, select the Administrator role check box, Click OK
Step 10)
Installing and configuring DAC
1) Click on Setup.exe in Oracle Business Intelligence Data Warehouse Administration Console directory ->Next-> In the Specify Installation Location, enter the path where you want to install DAC -> select the informatica version 8.x -> Specify the locations of Informatica PowerCenter Services and Informatica PowerCenter domain file -> click install-> Finish
2) For JDBC Connectivity copy the file ojdbc14.jar from jdbc\lib(ex:- C:\oracle\product\10.2.0\db_1\jdbc\lib\classes14.jar) to dac\lib(as I am using database 10g if its 11g then copy ojdbc6.jar from jdbc\lib to dac\lib)
Applying DAC Patch
Apply DAC Cumulative Patch 10052370, follow the 'readme.txt' file in the folder p10052370_101341_Generic(which is extracted after you download the patch)
Step 11)
Creating ODBC Connection on Windows
Control Panel ->Administrative Tools ->Data Sources(ODBC)->SYSTEM DSN T->Add->select Oracle Merant ODBC
Enter the following details
Data Source Name – EBS R12
Server Name – apps
Client version – 10gR1
Click Test to check for connectivity.
Step 12)
Copying the Metadata Files
1) Copy the Folder name ‘Export’ from ‘OraclelBI\dwrep\DAC_metadata\DAC_Client\export’ to ‘dac\export’
2) Copy the file ‘deletetriggers.list’ from ‘OraclelBI\dwrep\DAC_metadata\DAC_Client’ to ‘dac\conf’
3) Copy the file ‘parameterfileOLTP.txt’ from ‘OraclelBI\dwrep\DAC_metadata\DAC_Server’ to ‘dac\Informatica\parameters\input’
4) Copy the file ‘parameterfileDW.txt´from ‘OraclelBI\dwrep\DAC_metadata\DAC_Server’ to ‘dac\Informatica\parameters\input’
Step 13)
Upgrading the DAC Repository Schema
1) Start the DAC Client clicking on startclient.bat from bifoundation\dac directory -> Click Configure->Create Connection->Connection Type->Enter ‘orcl’ as connection string->Host name of orcl database->1521->leave default->leave default->click on create authentication file-> navigate to the folder where you want to store the file, click OK->Enter a unique name for Authentication file, click OK->enter table owner name as ‘dac_rep’ and password, click test connection->Apply->Finish
2) In the Login Dialog box select the connection->enter username as Administrator->enter password ->login ->Click YES for ‘Create a repository’
Step 14)
Importing metadata in DAC Repository
Go to DAC->Tools->DAC Repository Management->Import->select Logical Check and System Check -> In the Application List table select Universal and Oracle R12.1(Our Source System version)->Select Truncate Repository check box->select Enable batch mode check box ->click ok->to confirm retype the text in text box and click yes->click yes->click OK.
Step 15)
Creating the Business Analytics Warehouse Tables
Go to DAC ->tools->ETL Management->Configure->in source dialog box select target and source database ->Click OK->Data Warehouse Configuration Wizard->select create data warehouse tables check box->click next->
In the Data Warehouse tab enter the details
Database type -> Oracle
Container-> Leave Blank
Table Owner-> DAC_REP
Password -> Password
ODBC Data Source -> ORCL
Data Area -> Leave as it is
Index Area -> Leave as it is
Select ‘Is Unicode’ option then Click Start
Step 16)
Configuring the Connection between DAC Server and DAC Client
Go to DAC->Tools-> DAC Server Management-> DAC Server Setup
In the Repository Connection Information Tab enter the following details:-
Connection Type – Oracle
Connection Fields – Select OCI8 and enter TNSNAME as ‘orcl’
Table Owner Name – dac_rep
Password – Password
Click |Test to check if its working and then click on save
Step 17)
Setting DAC System Properties
Go to DAC->Views menu->Setup-> DAC System Properties
DAC Server Host – Host Name where you installed DAC Server
DAC Server OS – Windows
InformaticaParameterFileLocation - \Informatica\PowerCenter8.6.1\ server\infa_shared\SrcFiles
Step 18)
Registering Informatica Services in DAC
Go to DAC ->Setup View->Informatica Servers Tab
1) Modify the record “INFORMATICA_DW_SERVER”
Name - Integration Service Name(It need not be the same as the one created in Step 5)
Type – Informatica
Service – Integration Service Name (as created in Step 5)
Server Port – 4006
Domain – Informatica Domain name
Login – Administrator
Password – Informatica Repository Password
Maximum Sessions – Leave the Default to 10
Repository Name - Oracle_BI_DW_Base.rep
Inactive – Leave it as default
Test to check if it’s working fine
Click Save
2) Modify the record “INFORMATICA_REP_SERVER”
Name – Repository Service Name (It need not be the same as the one created in Step 4)
Type – Repository
Hostname – Hostname of Repository Server
Server Port – 6001
Login – Administrator
Password – Password
Maximum Sessions – 10
Repository Name - Oracle_BI_DW_Base.rep
Inactive - Leave it as default
Test to check if it’s working fine
Click Save
Step 19)
Setting Physical Data Sources
Go to DAC -> Setup-> Physical Data Sources
Name – DataWarehouse (Do not Change this to anything else, this is the default)
Type – Warehouse
Connection Type – Oracle(OCI 8)
Instance or TNS Name – ORCL
Table Owner – DAC_REP
Table Owner Password – Password
Max Num Connections – Leave as default
DB Host – Full name of Database Instance (ex:- orcl.domain.com)
Port – 1521
Dependency Priority – Leave as default
Data Source Number - Leave as default
Default Index Space - Leave as default
Test to check if it’s working fine
Click Save
Step 20)
Configuring Relational and Application Connections in Informatica Workflow Manager
Goto Informatica PowerCenter Workflow Manager from Start->Programs
Click on Repository->Add->Add Repository Dialogue box ->
Repository - Oracle_BI_DW_Base
Username – Administrator
Choose the repository and click on Connect->Connect to Repository dialog box appears
Password – Administrator
Click Add beside Add Domain box
Specify the Domain that was created during Informatica PoweCenter Services installation
Hostname – Full Name of machine(Ex: hostname.domain.com)
Gateway – 6001
Click OK and Save and click on Connect
Step 21)
Configuring Relational Connections
Goto Informatica PowerCenter Workflow Manager from Start->Programs
New -> select Oracle as database type ->OK
Define the Connections in relational connection dialog box
Name – DataWarehouse( This should be exactly same as the one in Physical Data Sources tab in DAC, else it will cause inconsistency between DAC and Informatica
Type – Oracle
User Name – info_rep
Password – Password
Connect String – Connection String of the database
CodePage – Your Code page
Step 22)
Configuring Oracle BI Repository Connections
In the physical layer click on Oracle Data Warehouse , Enter the connection information for data warehouse in Oracle Data Warehouse Connection Pool and Oracle Data Warehouse Repository Initblocks Connection Pool.
Step 23)
Configuring Connection Pools
Goto File Open in Oracle BI Administration Tool and open OracleBIAnalyticsApps.rpd file from \OracleBI\Server\Repository
In the Physical pane, double-click the Oracle Data Warehouse object, in the database field specify Oracle and click on Save, click Yes when it asks to check global Consistency, click OK when the warnings are displayed.
In the Physical Pane double-click the Oracle Data Warehouse Connection Pool to display the Connection Pool dialog.
Do not change the below fields starting with VALUEOF, these are Functions which will update the value from Variables Manager, which will be configured in next step.
Data source name - 'VALUEOF(ORACLE_OLTP_USER)'
User name field - 'VALUEOF(ORA_EBS_OLTP_DSN)'
Password – Password
Step 24)
Configuring Repository Variables
In Oracle BI Administration Tool click on Manage -> Variables ->Static
OLAP_DSN – Data Source Name of warehouse database
OLAP_USER – DAC_REP
OLAPTBO - DAC_REP
GLOBAL_CURRENCY1 - Same as the one specified in Source System Parameter values in DAC
GLOBAL_CURRENCY2 - Same as the one specified in Source System Parameter values in DAC
GLOBAL_CURRENCY3 - Same as the one specified in Source System Parameter values in DAC
ORA_EBS_OLTP_DSN - EBS R12(Created in Step 11)
ORA_EBS_OLTP_USER - apps
Step 25)
Creating a new Container
You will not be able to edit the pre-configured containers so create a new container.
Goto DAC -> File -> New Source System Container -> Create as a Copy of Existing Container-> select Universal from drop down -> OK
Step 26)
Creating an ETL Process
In DAC -> Goto Execute view -> click on Execution Plan tab -> New -> Edit -> Specify Name of the ETL Process -> Goto Subject Areas->Click on Add/Remove -> Select the new container that you created in above step -> Select Financials – Payables or anything click Add and OK
On the Parameters tab click Generate , select the below values
DBConnection_OLAP - DataWarehouse
DBConnection_OLTP - ORA_R12
Click Build
Do not Click Run Now as you will get an error ORA-01452: cannot CREATE UNIQUE INDEX; duplicate keys found during Full Load of ETL
There is a bug in R12 Vision that has to be removed before running a full ETL
Go to the Source system, connect using apps, issue the following command
SQL> SELECT person_id, effective_start_date, effective_end_date FROM per_all_people_f WHERE person_id = 6272;
person_id | effective_start_date | effective_end_date |
6272 | 04-JAN-91 | 06-FEB-02 |
6272 | 04-JAN-91 | 31-DEC-12 |
| |
|
As you can see person_id ‘6272’ has duplicate values effective_start_date, change the effective_start_date in the second row to a date after 06-FEB-02 or delete that record by giving
SQL> delete from per_all_people_f where person_id=6272 and effective_end_date ='06-FEB-02';
1 row deleted.
Now Goto DAC and click on Run Now to Start Full Load.